 自定义确认授权页面
提示
本文将讲解如何自定义 jap-ids 的确认授权页面
# 问题
和 自定义登录页面 的需求场景一致,在很多时候,开发者并不喜欢 jap-ids 内置的确认授权页面,比如:
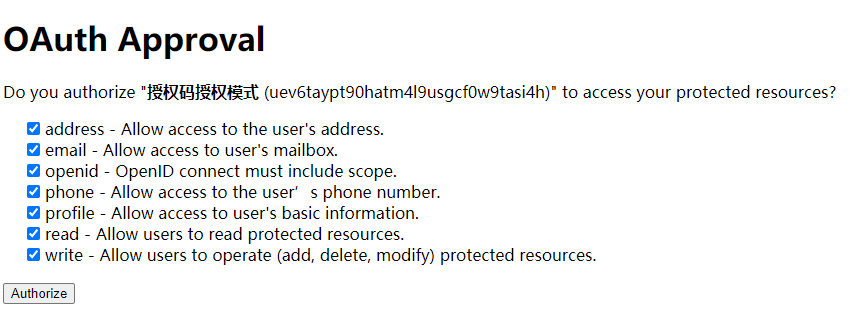
这个时候,开发者就需要自定义自己的确认授权页面。
# 1. 在授权服务中自定义确认授权页面
代码仅供参考,完整代码,请参考:jap-ids-demo (opens new window)
# 开发Controller 接口
@RequestMapping("/oauth")
@RestController
public class ApprovalController {

    // 其他代码略

    /**
     * 演示自定义授权页面实现方式,需要通过 <code>JapIds.registerContext(new IdsContext().setIdsConfig(new IdsConfig().setConfirmPageUrl("/oauth/confirm/customize")</code> 配置授权页面的入口
     *
     * @param request
     * @param model
     * @return
     * @throws IOException
     */
    @GetMapping("/confirm/customize")
    public ModelAndView confirmCustomize(HttpServletRequest request, Model model) throws IOException {
        ApprovalEndpoint approvalEndpoint = new ApprovalEndpoint();

        IdsResponse<String, Map<String, Object>> getAuthClientInfo = approvalEndpoint.getAuthClientInfo(new JakartaRequestAdapter(request));
        Map<String, Object> data = getAuthClientInfo.getData();
        ClientDetail clientDetail = (ClientDetail) data.get("appInfo");
        List<Map<String, Object>> scopeInfos = (List<Map<String, Object>>) data.get("scopes");
        String requestPath = ObjectUtils.appendIfNotEndWith(JapIds.getIdsConfig().getAuthorizeUrl(), "?") + request.getQueryString();
        // 当前授权应用的详细信息
        model.addAttribute("clientDetail", clientDetail);
        // 当前应用的授权 scope 列表
        model.addAttribute("scopeInfos", scopeInfos);
        // form 表单的 action 值
        model.addAttribute("requestPath", requestPath);
        return new ModelAndView("confirm");
    }

}
1
2
3
4
5
6
7
8
9
10
11
12
13
14
15
16
17
18
19
20
21
22
23
24
25
26
27
28
29
30
31
32
33
2
3
4
5
6
7
8
9
10
11
12
13
14
15
16
17
18
19
20
21
22
23
24
25
26
27
28
29
30
31
32
33
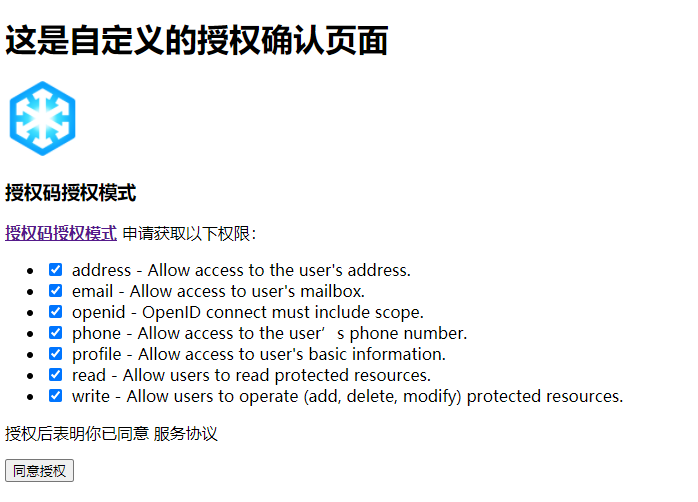
# 开发 HTML 页面
<!DOCTYPE html>
<html style="margin-right: 0px">
<head>
   <meta charset="utf-8"/>
   <meta content="width=device-width,initial-scale=1" name="viewport"/>
   <meta content="JustAuthPlus 演示自定义授权页" name="keywords"/>
   <meta content="JustAuthPlus 演示自定义授权页" name="description"/>
   <title>JustAuthPlus 演示自定义授权页</title>
</head>
<body>
<div id="app">
   <div aria-labelledby="modalSignupVerticalTitle" aria-modal="true" role="dialog" tabindex="-1"
        class="modal fade show portal-container">
      <div role="document" class="modal-dialog modal-dialog-centered">
         <div class="modal-content border-0">
            <div class="card">
               <p class="card-header">
               <h1>这是自定义的授权确认页面</h1>
               </p>
               <div class="card-body confirm-box">
                  <div class="d-block text-center">
                     <img th:src="${clientDetail.logo}" class="card-img-top" style="width: 75px"/>
                     <h3 class="modal-title mt-4 mb-4 text-gray-800" th:text="${clientDetail.appName}"></h3>
                  </div>
                  <form th:action="${requestPath}" method="post" name="confirmationForm" class="mb-6 mt-4">
                     <p>
                        <a target="_blank" th:href="${clientDetail.siteDomain}"><strong
                                th:text="${clientDetail.appName}"></strong></a>
                        申请获取以下权限:
                     </p>
                     <ul class="list-group scope-list">
                        <li class="list-group-item p-2" th:each="scopeInfo : ${scopeInfos}">
                           <input th:value="${scopeInfo.code}" checked name="scopes" readonly="readonly"
                                  type="checkbox" class="mr-2" style="margin-right: 5px;"
                                  th:if="${scopeInfo.selected}"/>
                           <input th:value="${scopeInfo.code}" name="scopes" readonly="readonly"
                                  type="checkbox" class="mr-2" style="margin-right: 5px;"
                                  th:unless="${scopeInfo.selected}"/>
                           <label th:text="${scopeInfo.code} + ' - ' + ${scopeInfo.description}"
                                  class="mb-0"></label>
                        </li>
                     </ul>
                     <p class="help-block mt-4 mb-2">
                        授权后表明你已同意 <a>服务协议</a>
                     </p>
                     <button type="submit" class="btn btn-primary pull-right btn-block mt-4 mb-2">
                        同意授权
                     </button>
                  </form>
               </div>
            </div>
         </div>
      </div>
   </div>
</div>
<script src="https://cdn.jsdelivr.net/npm/jquery@3.5.1/dist/jquery.min.js"></script>
<script src="https://cdn.jsdelivr.net/npm/bootstrap@4.5.2/dist/js/bootstrap.bundle.min.js"></script>
</body>
</html>
1
2
3
4
5
6
7
8
9
10
11
12
13
14
15
16
17
18
19
20
21
22
23
24
25
26
27
28
29
30
31
32
33
34
35
36
37
38
39
40
41
42
43
44
45
46
47
48
49
50
51
52
53
54
55
56
57
58
59
2
3
4
5
6
7
8
9
10
11
12
13
14
15
16
17
18
19
20
21
22
23
24
25
26
27
28
29
30
31
32
33
34
35
36
37
38
39
40
41
42
43
44
45
46
47
48
49
50
51
52
53
54
55
56
57
58
59
# 修改 IdsConfig 配置
JapIds.registerContext(new IdsContext()
    .setIdsConfig(new IdsConfig()
            // 关键这一句代码,不要带域名,jap-ids 会自动拼装为 issuer + ConfirmPageUrl
            .setConfirmPageUrl("/oauth/confirm/customize")
    )
);
1
2
3
4
5
6
2
3
4
5
6
# 启动服务并访问
# 2. 在前后端分离的场景下自定义确认授权页面
如果开发者的项目采用前后端分离的场景,确认授权页面部署到其他静态资源服务中,也就是说确认授权页面所在的服务的域名和授权服务的域名并不一致的情况下,jap-ids 也支持自定义这种场景的确认授权页面。
代码仅供参考,完整代码,请参考:jap-ids-demo (opens new window)
注意
这儿默认你已经准备好了前端服务
# 修改 Controller 接口
因为是前后端分离的项目,所以 controller 接口以 json 格式返回相关确认授权表单的参数。
@RequestMapping("/oauth")
@Controller
public class ApprovalController {

    // 其他方法略

    @GetMapping("/confirm/customize")
    @ResponseBody
    public Object confirmCustomize(HttpServletRequest request, Model model) throws IOException {
        ApprovalEndpoint approvalEndpoint = new ApprovalEndpoint();

        IdsResponse<String, Map<String, Object>> getAuthClientInfo = approvalEndpoint.getAuthClientInfo(new JakartaRequestAdapter(request));
        Map<String, Object> data = getAuthClientInfo.getData();
        ClientDetail clientDetail = (ClientDetail) data.get("appInfo");
        List<Map<String, Object>> scopeInfos = (List<Map<String, Object>>) data.get("scopes");
        String requestPath = ObjectUtils.appendIfNotEndWith(JapIds.getIdsConfig().getAuthorizeUrl(), "?") + request.getQueryString();
        // 当前授权应用的详细信息
        model.addAttribute("clientDetail", clientDetail);
        // 当前应用的授权 scope 列表
        model.addAttribute("scopeInfos", scopeInfos);
        // form 表单的 action 值
        model.addAttribute("requestPath", requestPath);
        return model.asMap();
    }

}
1
2
3
4
5
6
7
8
9
10
11
12
13
14
15
16
17
18
19
20
21
22
23
24
25
26
2
3
4
5
6
7
8
9
10
11
12
13
14
15
16
17
18
19
20
21
22
23
24
25
26
# 修改 IdsConfig 配置
JapIds.registerContext(new IdsContext()
    .setIdsConfig(new IdsConfig()
            // 配置授权确认页面的地址,必须为包含 http 协议头的完整地址
            .setConfirmPageUrl("http://localhost:8080/oauth/confirm/customize")
            // 指定当前授权确认页面为外部页面,当使用外部授权确认页面时,该值必须置为 true
            .setExternalConfirmPageUrl(true)
    )
);
1
2
3
4
5
6
7
8
2
3
4
5
6
7
8
注意
- 当使用外部授权确认页面时,
ExternalConfirmPageUrl必须设置为true ConfirmPageUrl必须为包含 http 协议头的完整地址
# 关于 IdsConfig 配置的注意事项
注意
- 当使用外部授权确认页面时,
ExternalConfirmPageUrl必须设置为true,且ConfirmPageUrl必须为包含 http 协议头的完整地址 - 当自定义的授权确认页面位于授权服务下时,
ConfirmPageUrl必须不包含 http 协议头,jap-ids 会自动拼装为issuer + ConfirmPageUrl
编辑 (opens new window)
Last Updated: 2021/10/07, 18:03:43