 自动授权
自动授权
提示
本文将讲解如何使用 jap-ids 的自动授权功能,跳过确认授权页面
# 问题
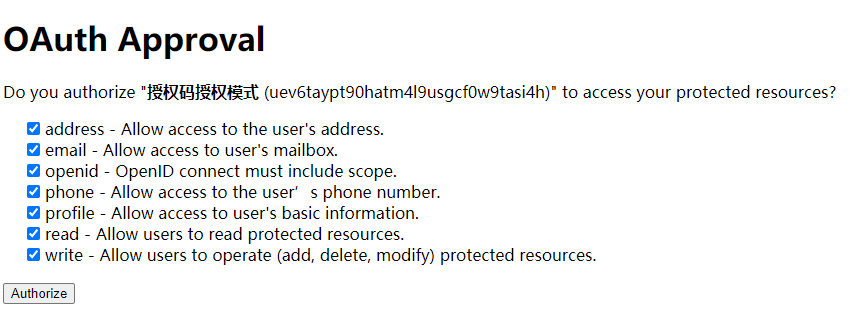
在很多时候,开发者可能不希望用户在通过 OAuth 登录时显示确认授权的页面

这种情况下,可以直接通过“自动授权”的方式,跳过确认授权页面。
# 拼装授权页面地址
在拼装授权页面时,在 URL 参数中,添加上 autoapprove=true 即可。比如:
http://localhost:8080/oauth/authorize?autoapprove=true&client_id=o2vzcf78lu1wfi5mi4q1k16yu5ph4cp2&response_type=code&scope=read write openid profile email phone address&redirect_uri=http://localhost:8080&state=1620965015351
1
# 提供自动授权的 controller 接口
在原有的基础上(快速开始),添加 /oauth/authorize/auto 接口。
提示
如果你开发的接口不是 /oauth/authorize/auto,请注意修改 IdsConfig 相关配置,配置方式参考:快速开始 - 第四步-开发相关-http-接口
@RequestMapping("/oauth")
@Controller
public class AuthorizationController {

    @GetMapping("/authorize")
    public RedirectView authorize(HttpServletRequest request) throws IOException {
        IdsResponse<String, String> idsResponse = new AuthorizationEndpoint().authorize(new JakartaRequestAdapter(request));
        return new RedirectView(idsResponse.getData());
    }

    @PostMapping("/authorize")
    public RedirectView doAuthorize(HttpServletRequest request) {
        IdsResponse<String, String> idsResponse = new AuthorizationEndpoint().agree(new JakartaRequestAdapter(request));
        return new RedirectView(idsResponse.getData());
    }

    /**
     * 自动授权,跳过确认授权页面
     *
     * @param request
     * @return
     */
    @GetMapping("/authorize/auto")
    public RedirectView doAuthorizeAutoApprove(HttpServletRequest request) {
        return this.doAuthorize(request);
    }
}
1
2
3
4
5
6
7
8
9
10
11
12
13
14
15
16
17
18
19
20
21
22
23
24
25
26
27
2
3
4
5
6
7
8
9
10
11
12
13
14
15
16
17
18
19
20
21
22
23
24
25
26
27
进行如上配置后,用户在登录时,就不会再显示确认授权页面了。
注意
自动授权功能,除了依赖 URL 中的参数 autoapprove=true 外,还需要 ClientDetail 支持当前应用允许自动登录。
其中 ClientDetail.autoApprove 属性为 true 时,才支持自动登录。
编辑 (opens new window)
Last Updated: 2021/10/07, 18:03:43
